|
|
Detailed Disassembly and Reassembly of the CZ 24 PistolThe CZ 24 in 9x17mm caliber (380 Auto) is a beautifully-made little pistol produced by Česká zbrojovka beginning in 1925. It has a short-recoil, locked-breech, rotating-barrel action that was later simplified to a blowback action for the CZ 27. Almost 200,000 were produced beginning in 1925. |
|
|
This early example was made in 1925. Before working on the pistol clear both the magazine and the chamber. |
|
|
The release button for the take-down latch is the right end of the cross pin, on the right side, just above the front of the trigger guard. If the slide is forward, pressure on the cross pin can make it hard to push. That pressure is released either by holding the slide slightly back, or by inserting an empty magazine and pulling the slide fully back. The magazine follower acts as a slide stop. |
|
|
The takedown latch is removed by pressing the cross pin on the right side and sliding the latch on the left side down. |
|
|
Now withdraw the cross pin/takedown latch to the left. |
|
|
Hold the slide against the pressure of the recoil spring to relieve pressure on the magazine follower/slide lock and remove the magazine. Then allow the slide to move forward. The slide will not come off with a magazine in place. |
|
|
Remove the slide. |
|
|
The recoil spring, guide rod, and barrel lug fall out. |
|
|
Rotate the barrel bushing counter clockwise about 30 degrees to line up the little marks on the bushing and the slide. |
|
|
Then the barrel bushing slips out to allow the barrel to be removed. The pistol is now fully field stripped. |
|
|
The very unusual extractor retaining pin is screwed in. |
|
|
Remove it with an appropriate screwdriver. |
|
|
The extractor and its tiny spring fall out. Or you may need to fish the spring out. |
|
|
The firing pin is retained like that of a Browning 1911; press in the firing pin with a punch and slide the retainer up to release the firing pin. Keep a finger in the way so the firing pin doesn't fly out and hit you in the eye or become lost. |
|
|
Here are the firing pin, the firing pin spring, and the firing pin retainer. |
|
|
Let the hammer down.There's a magazine safety, so you can't release the hammer without putting the magazine back in. |
|
|
After the grip screws are removed, the one-piece walnut grip slides off to the rear. |
|
|
The magazine catch and the mainspring are dovetailed into the rear of the frame. |
|
|
Here we've removed the mainspring screw and pried the mainspring up a bit. I don't want to remove it because it won't be easy to put it back. I'll just clean it up with the mainspring and the magazine catch in place. |
|
|
The magazine catch can be removed by pushing the lower end back to disengage the tabs from the frame and prying it downward, but I'd rather not. |
|
|
The side plate is held in grooves at the front and rear; this little screw keeps it from moving up. Loosen this screw a few turns to allow the side plate to move up; the screw doesn't need to be removed. |
|
|
When the screw is out far enough, the side plate should easily slide up. Or, it might need to be tapped a bit with a nylon punch. |
|
|
Here the side plate is partially removed. We can see the little hole the side plate screw goes in to to hold the side plate down. |
|
|
And now the lockwork is revealed. It's elegantly simple. The hook on the trigger lifts the forward end of the transfer bar via the disconnector, and the rear end of the transfer bar, the sear, goes down to release the hammer. If the safety is engaged the rear end of the safety is up to block the sear. |
|
|
The safety (directly under the old guy's thumb) is held in primarily by the grip, and by friction with the transfer bar/safety spring which extends from the rear end of the transfer bar, through a hole in the frame, to the inside bottom edge of the safety. |
|
|
We pull out the safety to the left to disengage it from the spring; it hooks on the frame at the front. |
|
|
After noticing how the bottom end of the transfer bar/safety spring had pushed down on the rear end of the safety... |
|
|
we lift out the safety release. It hooks in the frame at its bottom end. |
|
|
We pull the transfer bar/safety spring down and out. |
|
|
We lift out the transfer bar. |
|
|
We don't need to disassemble the transfer bar. The spring-loaded pivoting part at the front end is the disconnector; it's pressed down and back when the breech is out of battery so the trigger can't hook to it. |
|
|
With the transfer bar out the trigger tips forward and we can see its litte spring. That little spring would be mashed if we just pulled out the trigger... |
|
|
so we press it into the trigger with a little tool while we lift out the trigger to the left. |
|
|
Now the trigger is out. |
|
|
Press forward on the mainspring if it's still there and lift out the hammer to the left. |
|
|
Now the hammer's out. Mine shows evidence of having been welded, crudely filed, and re-blued around the part that sticks out to engage with the sear. That's scary. I don't think I'll carry this gun "cocked and locked". |
|
|
The magazine safety is held in by this little pin. It comes out easily if tapped toward the left. |
|
|
Here are the magazine safety and its pin. |
|
|
The ejector is held by this pin but doesn't need to be removed. |
|
|
That mostly completes the disassemby of the CZ 24. |
|
|
It works to assemble the frame in the sequence that follows. We'll cover some of the tricky, strange, or unusual features. 
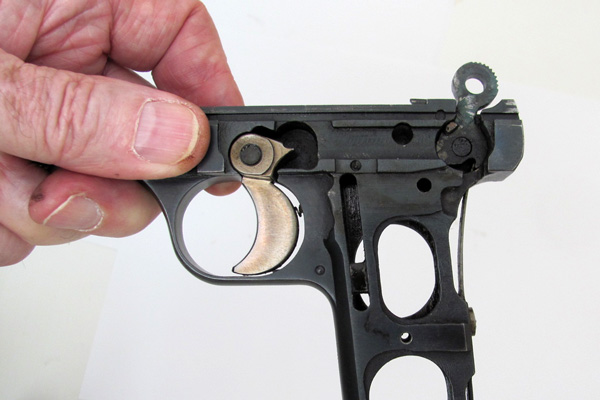
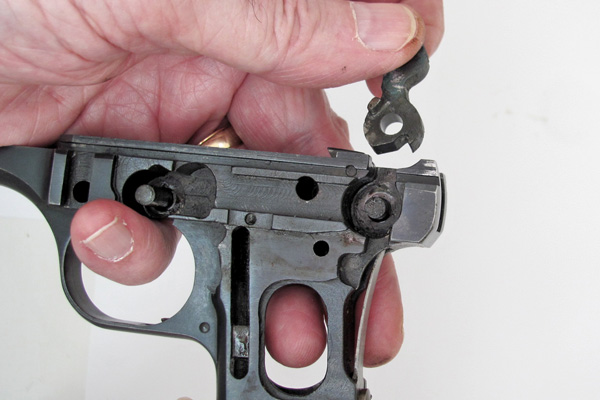
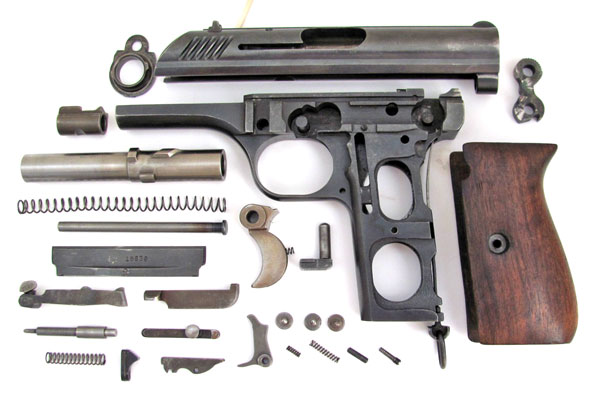
Install the hammer spring first if it was removed, and then the hammer. Push the top of the hammer spring forward to allow the hammer to drop in with the top end of the spring in the notch in the hammer.
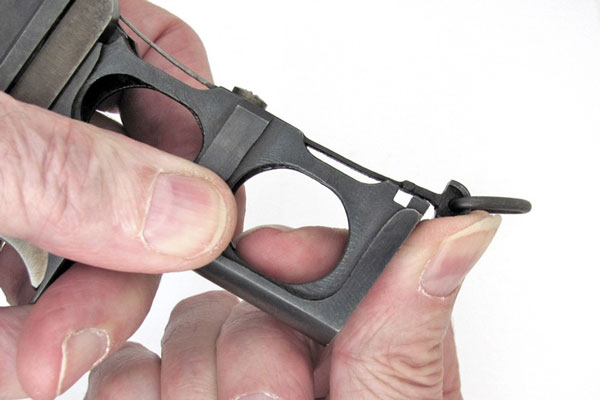
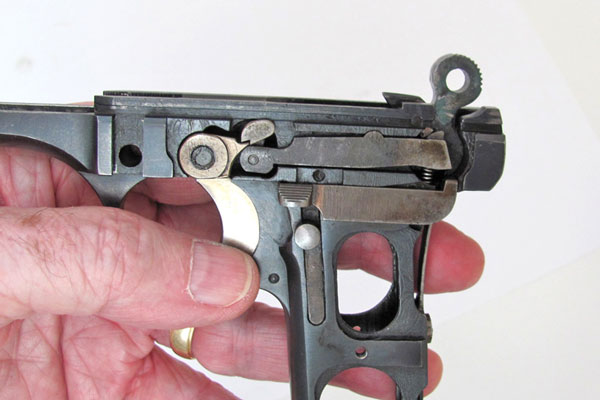
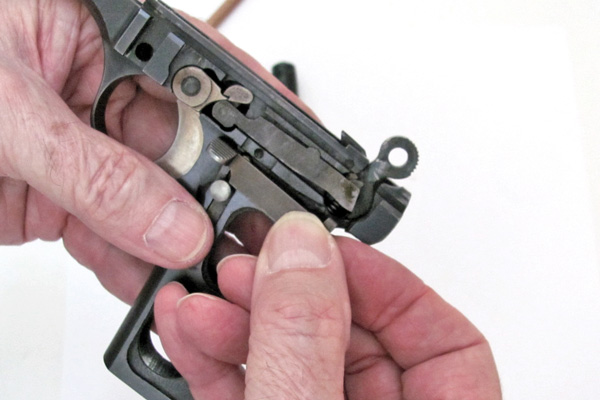
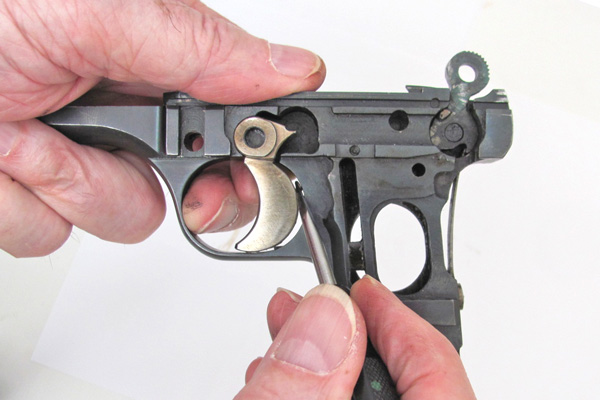
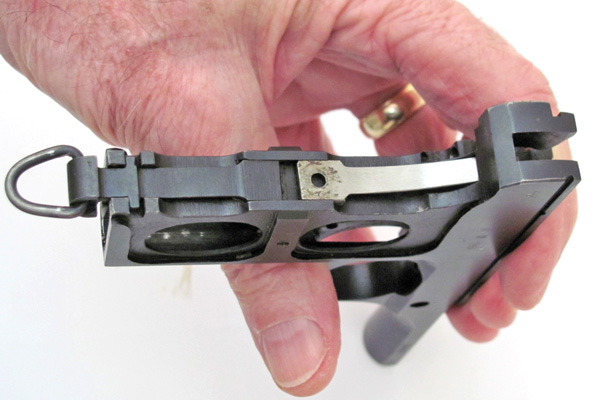
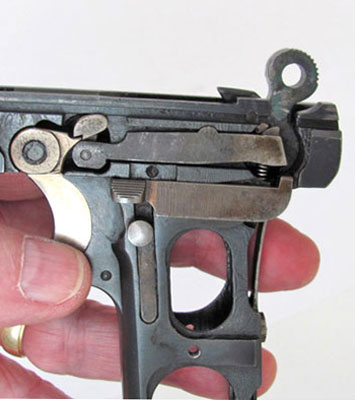
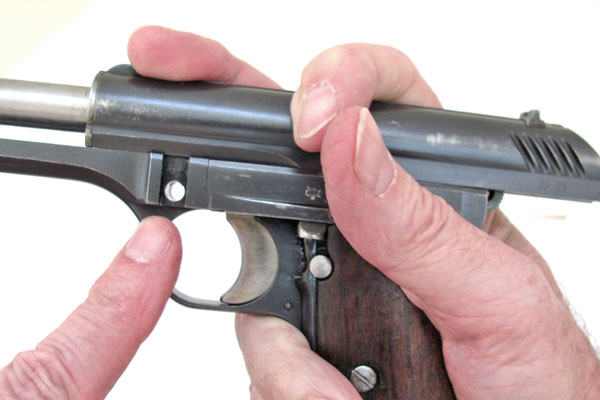
 Install the magazine safety, use a thin blade to compress the trigger spring so the trigger will drop in, and install the transfer bar/safety spring. 
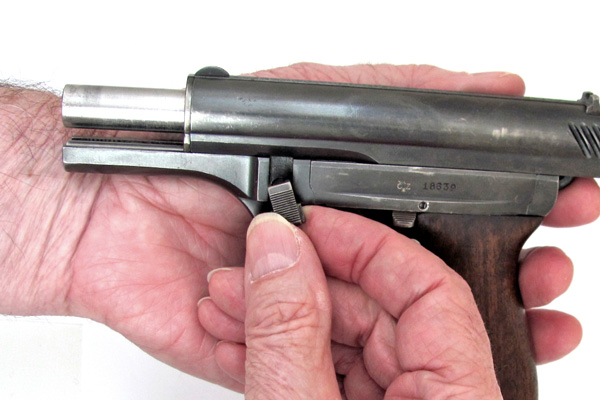
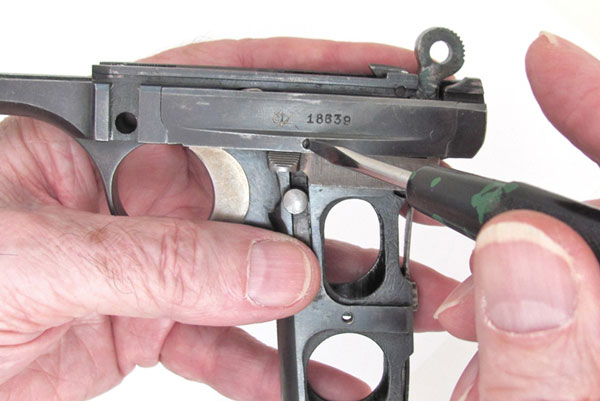
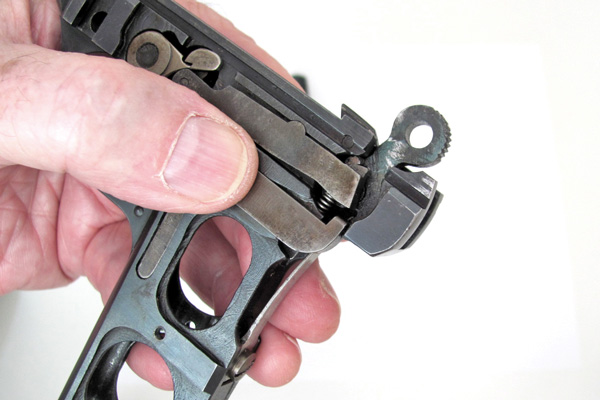
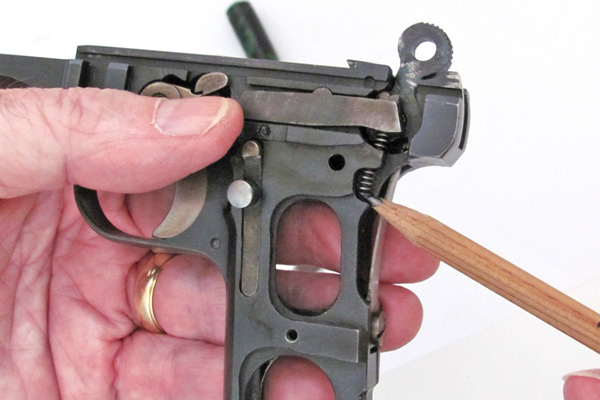
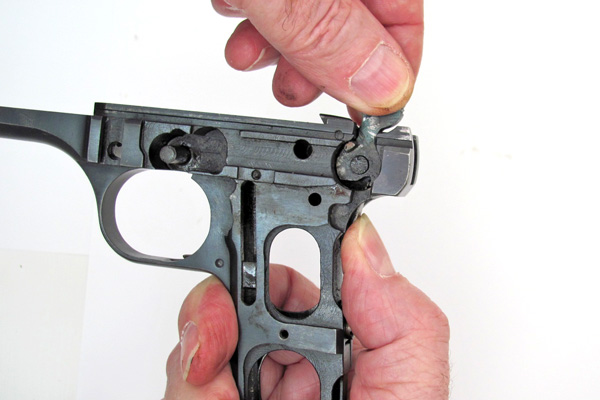
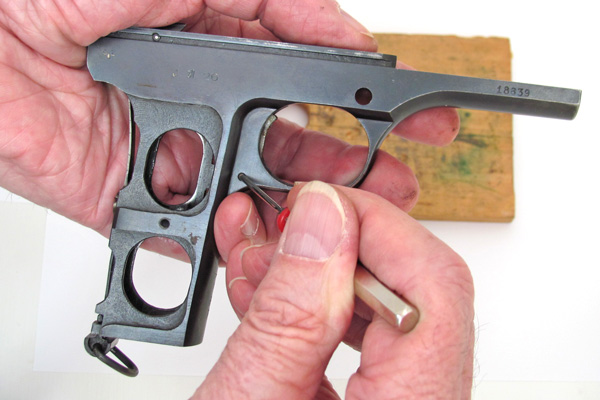
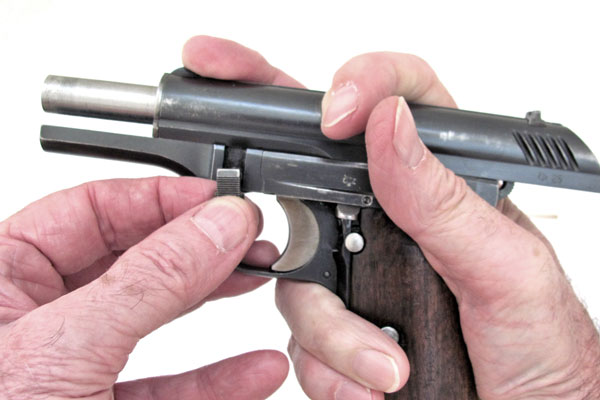
After the safety release is in place, diddle the safety in so its front hooks on the frame and the bottom of its rear end is under the transfer bar/safety spring. 
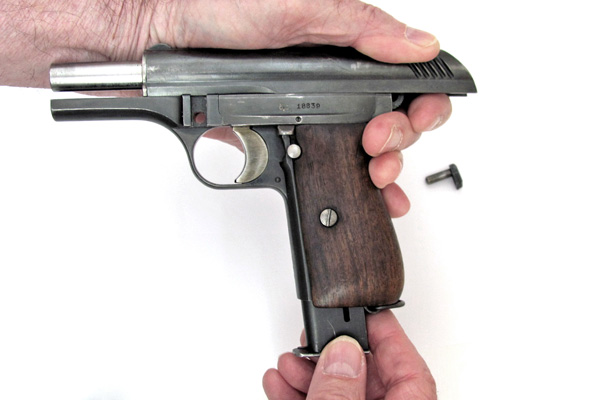
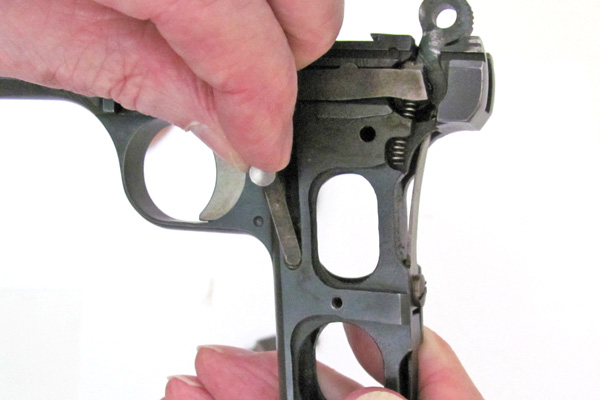
The grip can then be pushed part way on to hold the safety in place, because it wants to fall out at this point. 
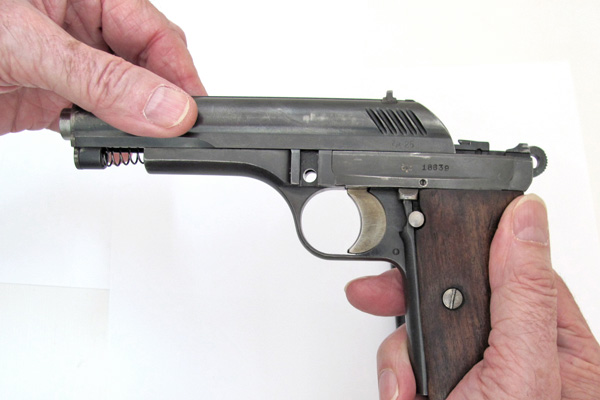
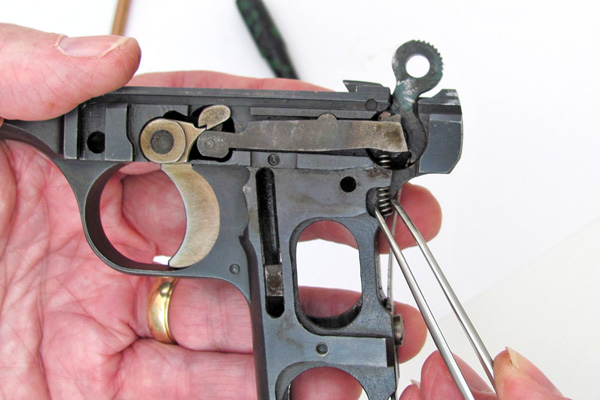
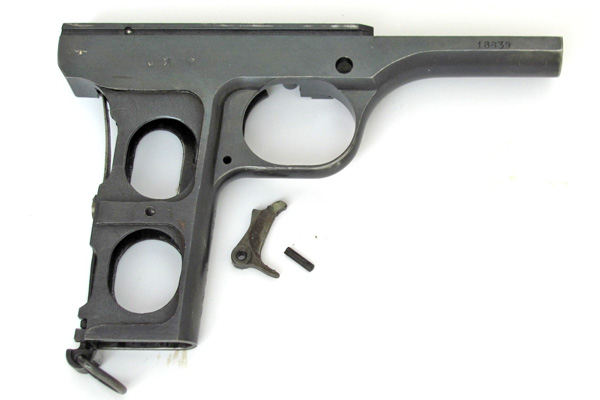
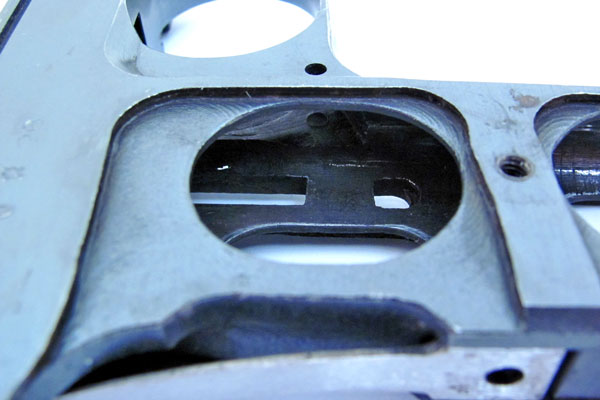
Insert the magazine to free up the trigger and pull the trigger back to allow the forward end of the transfer bar (the disconnector) to drop in. Press the top of the transfer bar/safety spring down with a thin blade and let the back end of the transfer bar (the sear) drop in. You might have to pull back the hammer to do this. 
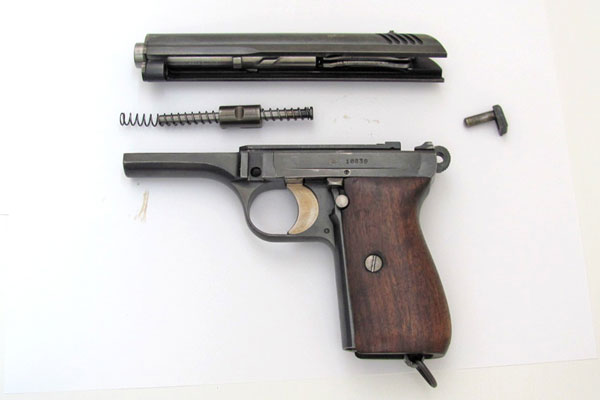
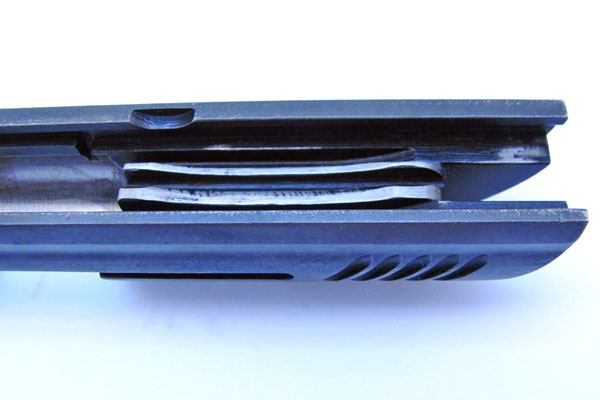
With both the safety and the transfer bar in place, their spring pretty much holds them in and you can remove the grip to admire your work. |
|
|
This is an unusual feature. The CZ 24 barrel rotates to disengage from the slide before the breech opens. Here we see a short helical lug on the barrel which engages with a slot in the stationary barrel retaining lug. In recoil, the barrel moves back with the slide and the retaining lug makes it rotate a few degrees before it disengages from the slide and stops while the slide continues to the rear. Thus it does what the Browning barrel link mechanism does, only more complicated, and more fun, I think. After producing the CZ 24 they decided a 380 Auto or 32 Auto doesn't need a locked breech anyway, so the later but otherwise identical CZ 27 has a blowback action. |
|
|
The recoil spring guide is installed with the knob toward the rear. The barrel retaining lug is symmetrical, so it can be installed either way. The recoil spring also can go either way. |
|
|
The slide will not go on with a magazine in place. Install the slide and pull it back until you can see the semi-circular cut-out in the barrel lug line up with the hole through which the take-down latch is to be inserted. |
|
|
Hold the slide back with one hand while you install the take-down latch with the other. |
|
|
An interesting feature is how the frame is machined to hold the wooden grip, which is also machined to fit. Those guys at CZ did excellent work. |
|
|
A strange feature is how the underside of the slide above the magazine is curved rather than flat as on just about every other pistol. |
|
|
On the left side of the slide beneath the serrations is the early Česká zbrojovka emblem, an arrow between the initials ČZ, followed by the last two digits of the year of manufacture. |
|
|
The proof mark is stamped on the right side of the frame, in this case the letter J, a rampant lion, and the last two digits of the year in which the gun was proofed. |
|
|
The last interesting feature is this military unit number stamped on the front of the grip strap. "3 V 166" indicates the 3rd Transport Batallion, inventory number 166. |
© 2026 Porter Rockwell